By Emma Hartley | Reviewed by IndoorCatWell Editorial Team | Last updated September 2026
This article provides practical, veterinary-supported cat care guidance. If you buy through our links, we may earn an affiliate commission at no extra cost to you. Read our full Affiliate Disclosure.
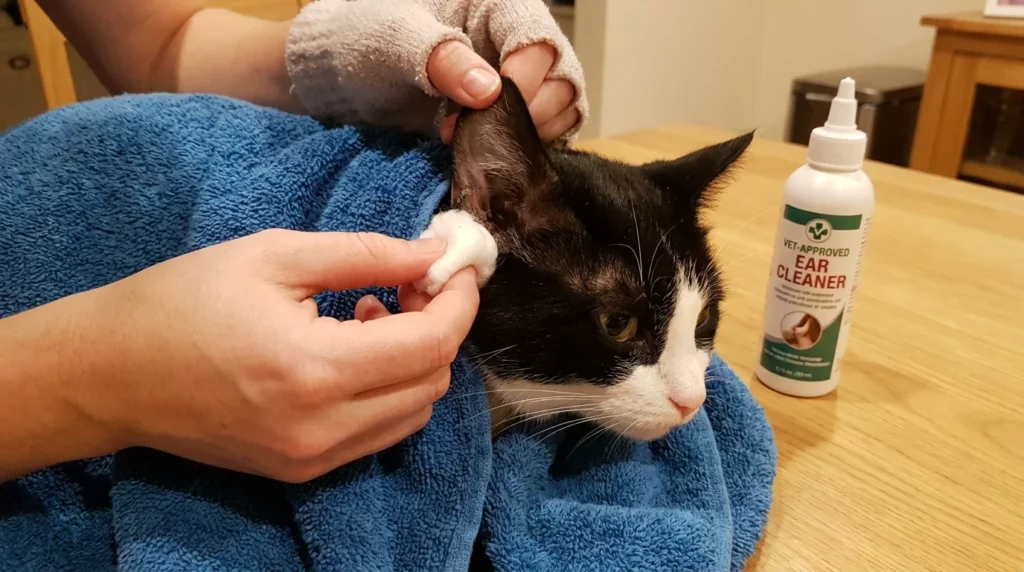
Most healthy domestic cats groom their own ears effectively and require little to no human intervention. However, when light wax or environmental dust accumulates on the visible pinna flap, a gentle flush with a veterinary-approved ear cleaner and sterile cotton balls restores hygiene safely. The cardinal rule of feline ear care: never insert cotton swabs (Q-tips), alcohol, or hydrogen peroxide into the ear canal.
⚡ Quick Protocol Rules
- Inspect Before Cleaning: Only clean pale, healthy ears with mild wax. Never clean red, hot, or weeping ears.
- Tools Needed: Veterinary feline ear cleanser, medical cotton balls or gauze pads, and lickable treats.
- The “Squish” Technique: Squeeze solution into the canal and gently massage the cartilaginous base for 30 seconds.
- Let Them Shake: Allow your cat to shake their head vigorously to fling loosened debris upward.
Check Before You Clean: Distinguishing Normal Wax from Infection
Gently fold back the ear flap (pinna) and inspect the canal opening in bright light. Healthy feline ears are pale pink, odorless, and show only occasional light amber or golden wax deposits.
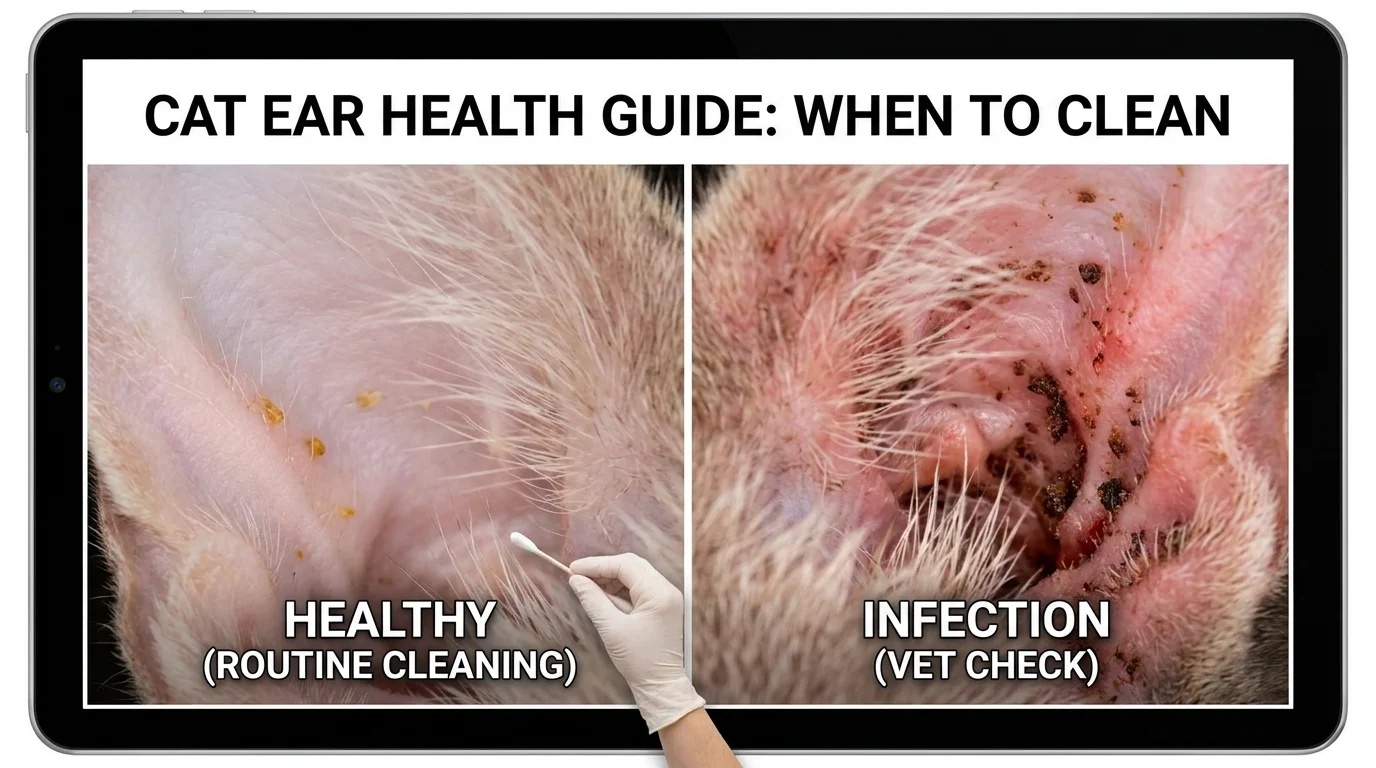
Veterinary Stop Sign: Do NOT clean your cat’s ears at home if you notice: bright redness or swelling, dark “coffee-ground” crumbly debris (classic ear mites), yellow/green purulent discharge, a sour or yeasty odor, or if your cat vocalizes in pain when touched. Attempting to flush an infected ear can rupture an inflamed tympanic membrane (eardrum) and cause permanent deafness.
What You’ll Need
- Veterinary-formulated ear rinse: An alcohol-free, drying cleanser (such as Virbac Epi-Otic or Dechra MalAcetic).
- Sterile cotton balls or woven gauze: Never use synthetic cotton swabs or makeup sponges.
- A soft towel: To swaddle wiggly paws into a calming wrap.
- High-value reward: Lickable puree treats to reward cooperation immediately.
Step-by-Step Ear Cleaning Protocol
- Warm the solution to body temperature: Cold fluid squirted into a cat’s ear canal induces instant vestibular vertigo and frantic thrashing. Warm the bottle in a bowl of lukewarm water for 5 minutes before use.
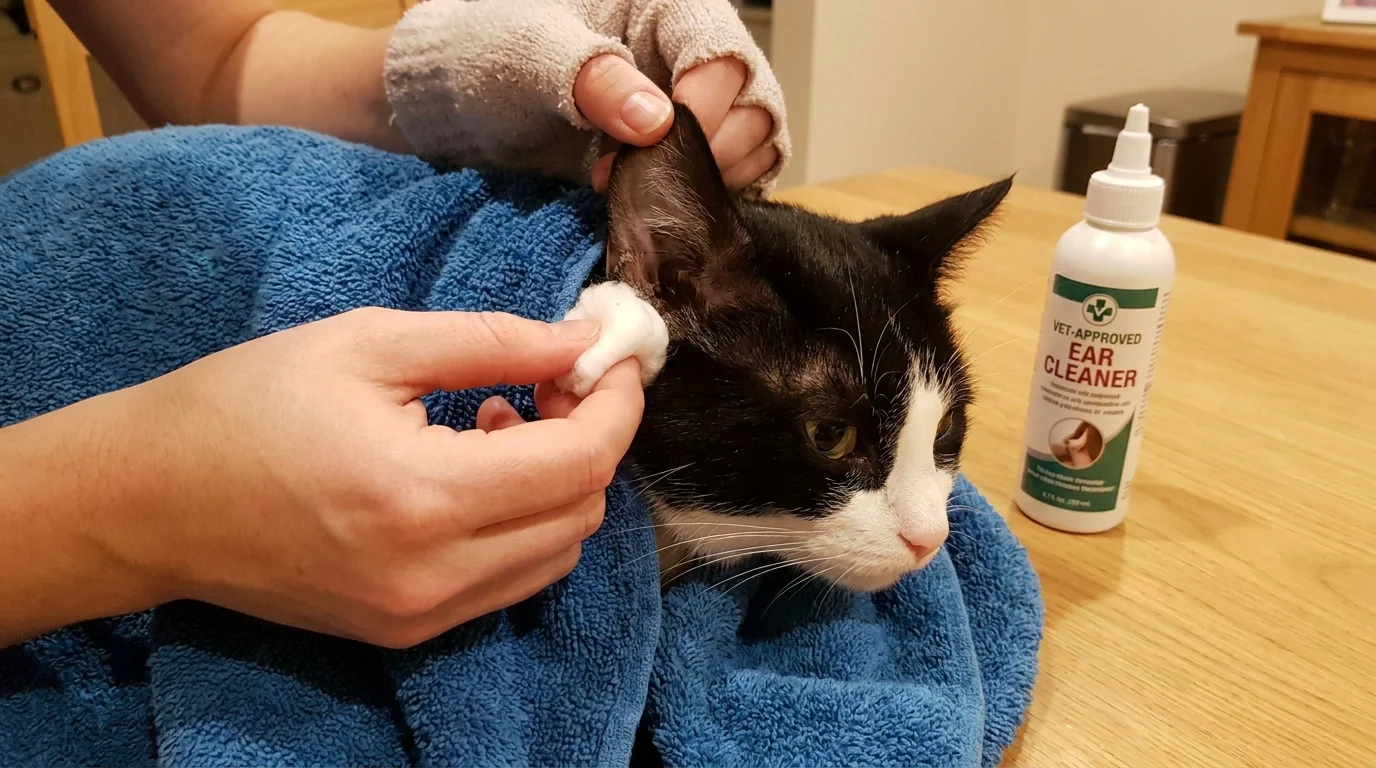
- Set up a secure posture: Place your cat on a table or in your lap wrapped comfortably in a towel burrito, leaving only the head exposed.
- Administer the solution: Gently lift the ear flap upward and squeeze a few drops of cleanser into the ear opening, or saturate a cotton ball and squeeze the liquid into the canal.
- Perform the 30-second base massage: Grasp the base of the ear just below the opening between your thumb and forefinger. Massage gently in circular motions. You should hear a distinct “squishing” sound as the cleanser breaks down cerumen plugs.
- Step back and let your cat shake: Release your grip and let your cat shake their head vigorously. This centrifugal force flings dissolved wax from the horizontal canal up into the outer ear flap.
- Wipe the visible flap only: Use a clean cotton ball or gauze wrapped around your index finger to wipe away loosened wax and moisture from the crevices of the outer flap. Never insert your finger deep into the canal.
- Repeat on the other side & reward: Complete the second ear, then immediately offer treats and affectionate praise.
What Never to Do: 4 Critical Mistakes
- 1. NEVER use Q-tips (cotton swabs): Cotton swabs act like a piston, ramming wax and debris deeper down against the eardrum while risking puncture if the cat flinches.
- 2. NEVER use rubbing alcohol or hydrogen peroxide: These harsh chemicals cause agonizing burning on sensitive feline canal tissue and cause deep chemical ulceration.
- 3. NEVER use DIY vinegar or olive oil mixes: Unbuffered home remedies disrupt the natural acidic microbiome of the feline ear canal, encouraging explosive yeast overgrowth.
- 4. NEVER force a panicked cat: If your cat exhibits extreme fear or growls, stop immediately. Rest, reset, and ask your veterinarian to demonstrate or clean the ears during your next routine exam.
Frequently Asked Questions
How often should an indoor cat’s ears be cleaned?
Only on an as-needed basis when visible wax appears. Over-cleaning healthy ears disrupts the epithelial lipid barrier and strips beneficial microflora, increasing infection risk. Routine checks every 2 to 4 weeks are recommended.
How do I distinguish ear mites from ordinary wax?
Normal wax is pale yellow or amber and smooth. Ear mites (Otodectes cynotis) produce intense itching, violent head-shaking, and dark, dry, granular discharge resembling used coffee grounds.
Can I use dog ear cleaner or baby wipes on my cat?
No. Many canine ear medications contain tea tree oil, chlorhexidine concentrations, or fragrances that are toxic to felines. Always check the label for explicit feline safety approval.
Authoritative Sources & References
- PetMD: How To Clean Cats’ Ears Safely – Step-by-Step Vet Guide
- Hill’s Pet: How to Clean Cat Ears: Practical At-Home Care
- Embrace Pet Insurance: Cleaning Cat Ears Safely at Home